No, a bare drive is nothing more then how it sounds. It's a drive that comes delivered as just the drive and not with the box or any fancy packaging
you'd find if you were to purchase a retail version of that same product. In most cases,
you'd be expected to pay considerably more money just for the box and packaging. We at shop4tech believe
that's absurd, and we know our customers want to pay for the product they are purchasing, and not for a box that will eventually end up getting thrown out anyway.
IMPORTANT:
Please Note: Bare drives do not come with an IDE/ATA cable, nor an instruction manual, however, we do offer software bundles with some of our bare drives. If a software bundle is included with a specific bare drive, it will be indicated by a picture or within that burners product description. Also, please understand there are no drivers installation disks with any
DVD burner, whether it be bare or retail. There has been some confusion with this, and to clarify, the drivers for your respective
DVD burner should be automatically installed by your Operating System. (i.e. Windows XP, etc.) The only thing you may need to update regularly would be your
DVD burners firmware. Please consult your DVD manufacturer for more information on updating firmware.
BASIC INSTALLATION INSTRUCTIONS
Installing your optical drives is an easy process that requires a bit of
attention to detail. Heres an easy-to-follow-installation guide:
Gather up all your drives. Many cases use removable drive rails or cages to
house drives. Use the included screws to attach your drives to the rails or
cage, and slide them into the case. For externally accessible drives such as
a DVD recorder, you can save time by installing one drive rail and sliding
the drive in for a test fitting to make sure that its front is flush with
the case. When the drives are installed, connect power and data cables to
each one. Parallel ATA drives use wide, flat data cables that can be
installed only in the correct way.
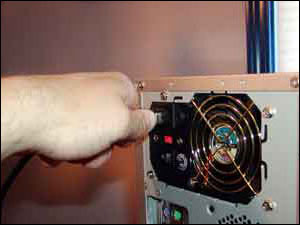
1. First, if your PC is running, shut it down and turn off the power switch.
2. Now find and remove the screws holding the case together.
3. Next, remove the case cover or panel from your PC.
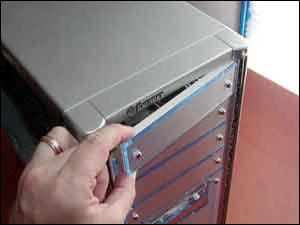
4. Find the 5.25-inch external drive cover. Thats where the drive will
be installed. Remove the cover.
5. Before sliding the drive into the drive bay, use the jumpers to set
the drive to be either a master or slave. If the drive will reside on its
own IDE cable, select the master setting. If the drive will be added to an
existing IDE cable, choose slave.
6. Note: if your drive bay requires slide rails, attach the drive rails
onto the sides of the drives.
7. Next, Slide the drive into the drive bay.
8. If the case does not use drive rails, attach the drive to the bay
using screws.
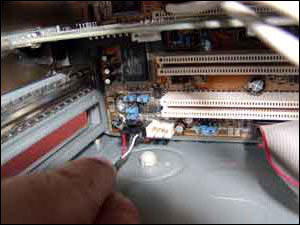
9. Attach the CD-Audio cable to the connector on the drive.
10. Attach the other end of the CD-Audio cable to the motherboard or
audio card.
11. Next, plug the IDE cable into the motherboard, if one isnt already
in place.
12. Attach the 4-pin power adapter in the drive.
13. Replace the case cover or panel.
14. Finally, turn the power switch on the power supply back on.
Still having trouble? If you've read these instructions in detail and are still having issues, please consult your drive manufacturers technical support team. The numbers for those technical support teams are as follows:
- Benq: 1-866-600-2367
- LiteOn: 1-408-935-5333
- LG: 1-800-243-0000
- NEC: 1-888-338-9549
- Piodata: 1- 800-421-1640
- Pioneer: 1-800-421-1404
- Plextor: 1-800-204-0332
- Sony: 1-800-588-3847


 View Cart


